How to Copy Media Across Portals
Effortlessly managing and sharing media within and across portals has been enhanced for your convenience. The copy feature simplifies copying your media between portals or within the same portal, allowing you to easily select associated metadata for the copied media, eliminating the need to input it again.
Note: Before proceeding with the media copying process, keep the following important points in mind:
- You cannot delete media during the copy process.
- Publish and view settings of the destination portal are applied to the copied media.
Prerequisites
- Ensure that you belong to a group where the Upload and manage all content permission is enabled to access this feature.
Copy Media from One Portal to Another
Accessing the Media Manager
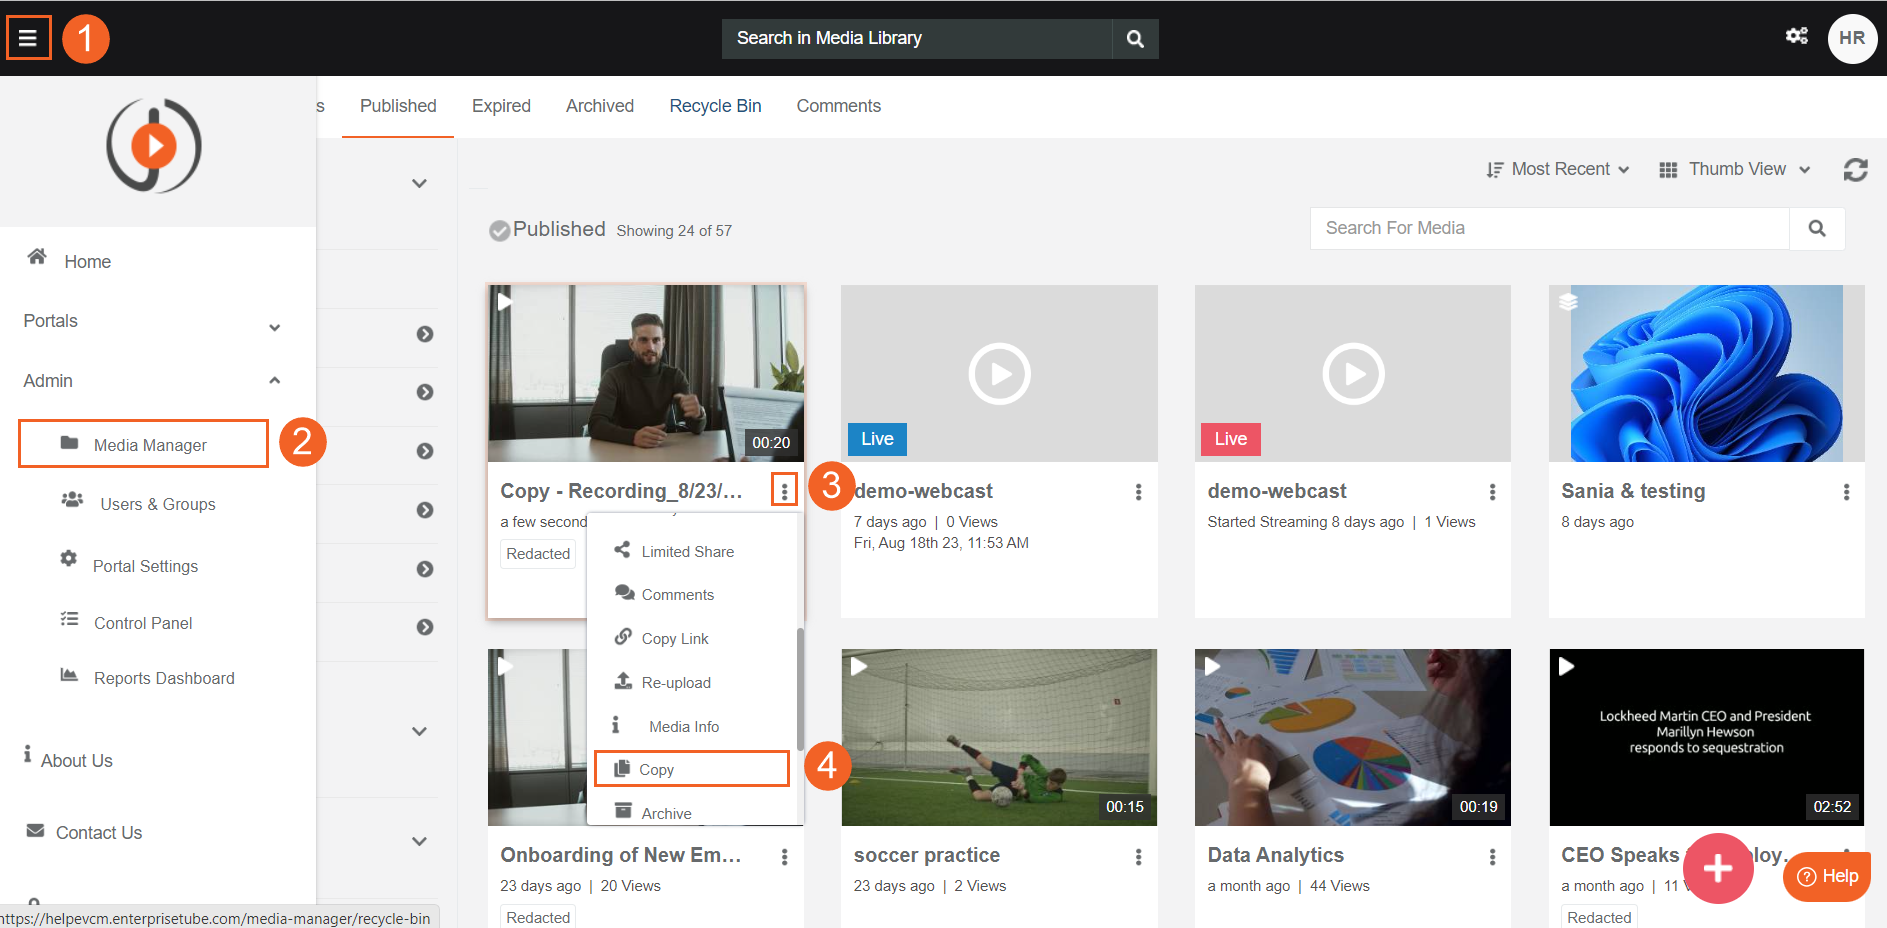
- Open the navigation menu.
- Click on Admin >> Media Manager.
- Choose the media you want to copy and click on its overflow menu icon.
- From the overflow menu, choose the Copy option.
Configuring Copy Settings
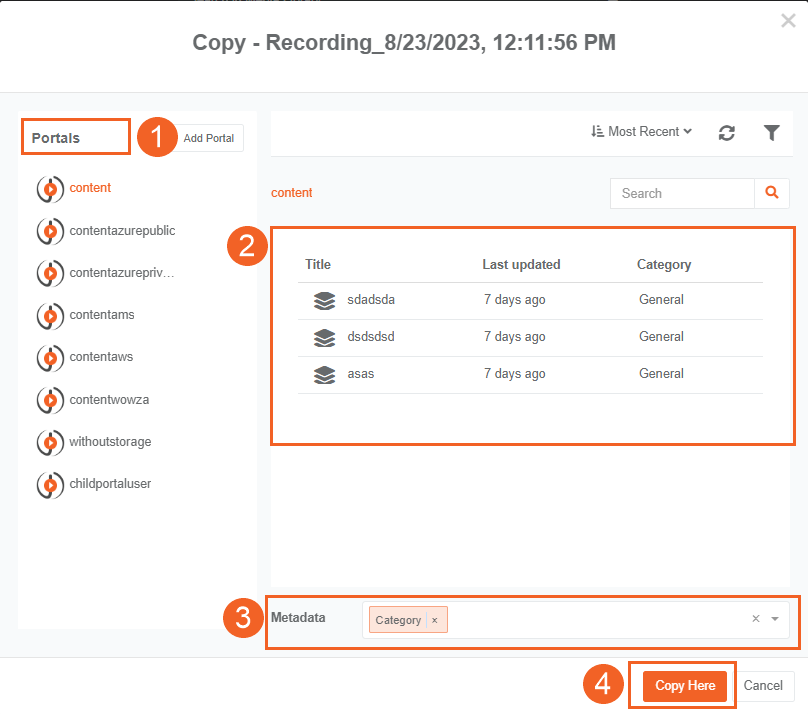
After choosing the Copy option, a popup modal will appear, allowing you to select which portals will receive the copied media.
- In the Portals segment within the modal window, select the desired portal to which you intend to copy your media file.
- On the right side, a list of folders will be visible. Specify where you want to place the copied media within the chosen portal.
- Utilize the dropdown menu to select the desired metadata for the copied video. This menu provides predefined metadata options, streamlining the process of selectively copying relevant metadata.
List of Metadata that Can Be Copied
- Insights: OCR, Transcription, Face, Brand, Emotion, Sentiment, Label, Topic, Keyword, Speaker, Annotation, Object, Person, Language
- Interactivity: Handout
- Weapon: Gun, Knife
- Vehicle: Car, Bike, Bus, License Plate, Truck
- Basic Metadata (Selected by Default): Custom Attributes, Tags, Description, Category
- Location: Drone
- Redacted Audio: Audio Segment
- Plugin: HubSpot, Text Overlays
- Comment: Notes
Note: When you select single or bulk mashup(s), the metadata dropdown will display only the metadata in the selected mashups. When copying folders, the dropdown menu displays all possible metadata and contents.
- Once you have chosen the metadata, click the Copy button at the bottom to initiate the copying process.
Adding a Portal
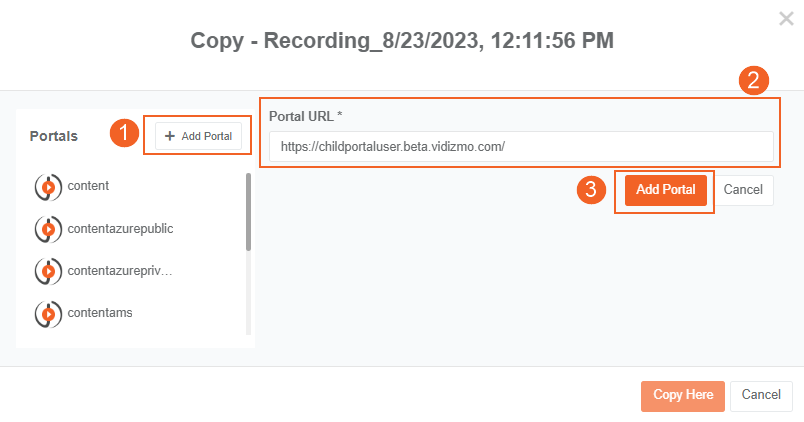
Vidizmo offers the additional option of adding hidden portals, which are portals you are part of. To add a hidden portal:
- Click the Add Portal button from the Portals section.
- Enter the URL of the destination portal.
- Click the Add Portal button. This adds the new portal to the list on the left.
- Select the recently added portal from the list and copy your media.
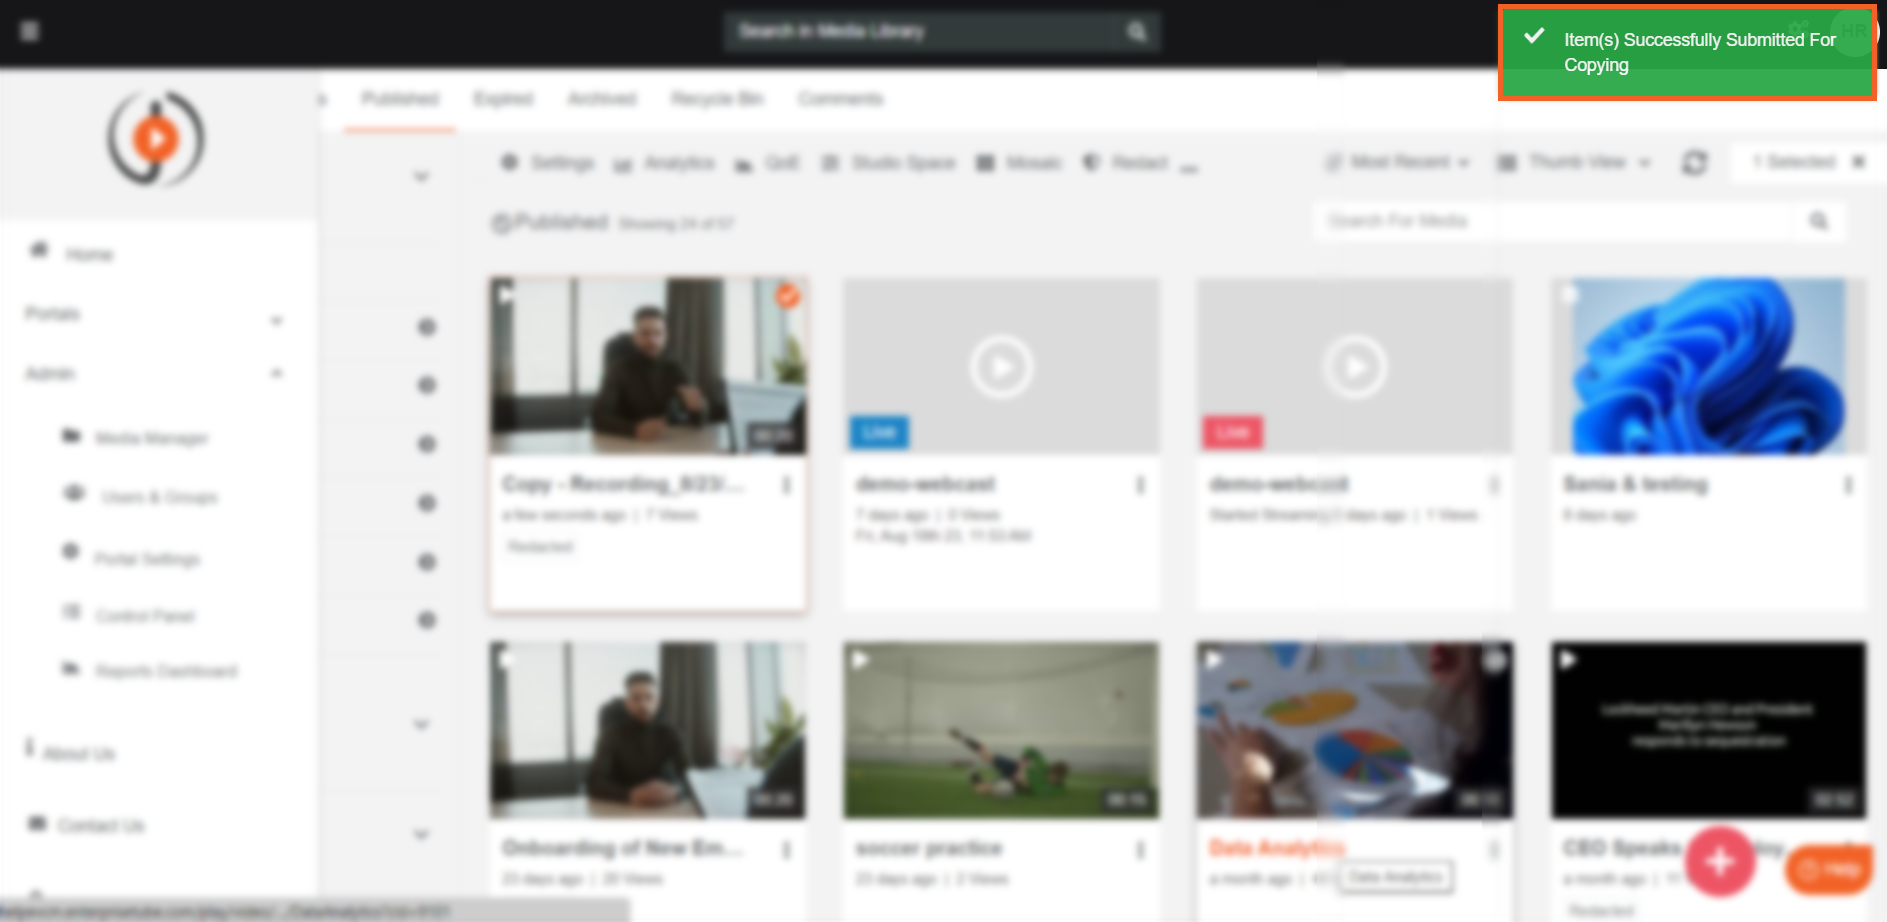
- Once completed, a notification will appear confirming the successful initiation of the copying process.
Verification and Completion
To track the progress of your media copying process:
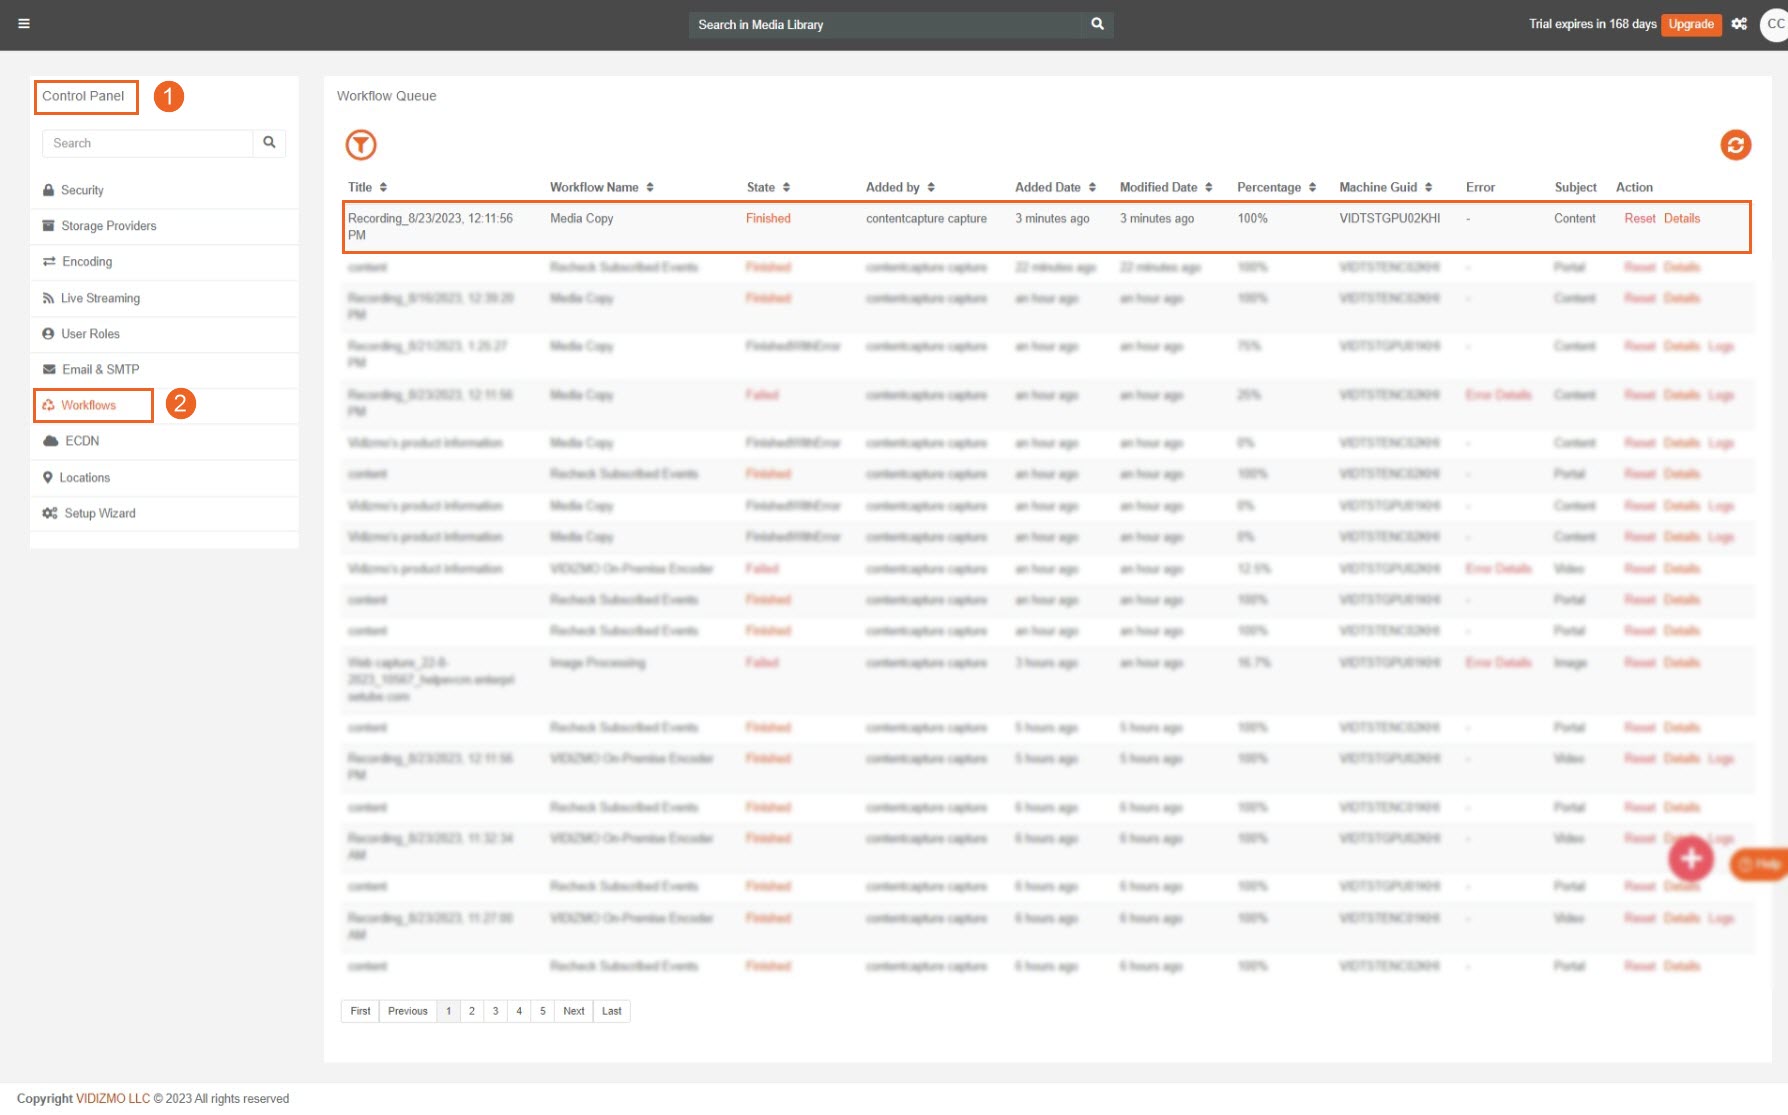
- Proceed to the Control Panel.
- Access the Workflows section and, within Workflow Queues, check the status of your file; a "Finished" status indicates a successful copying process.
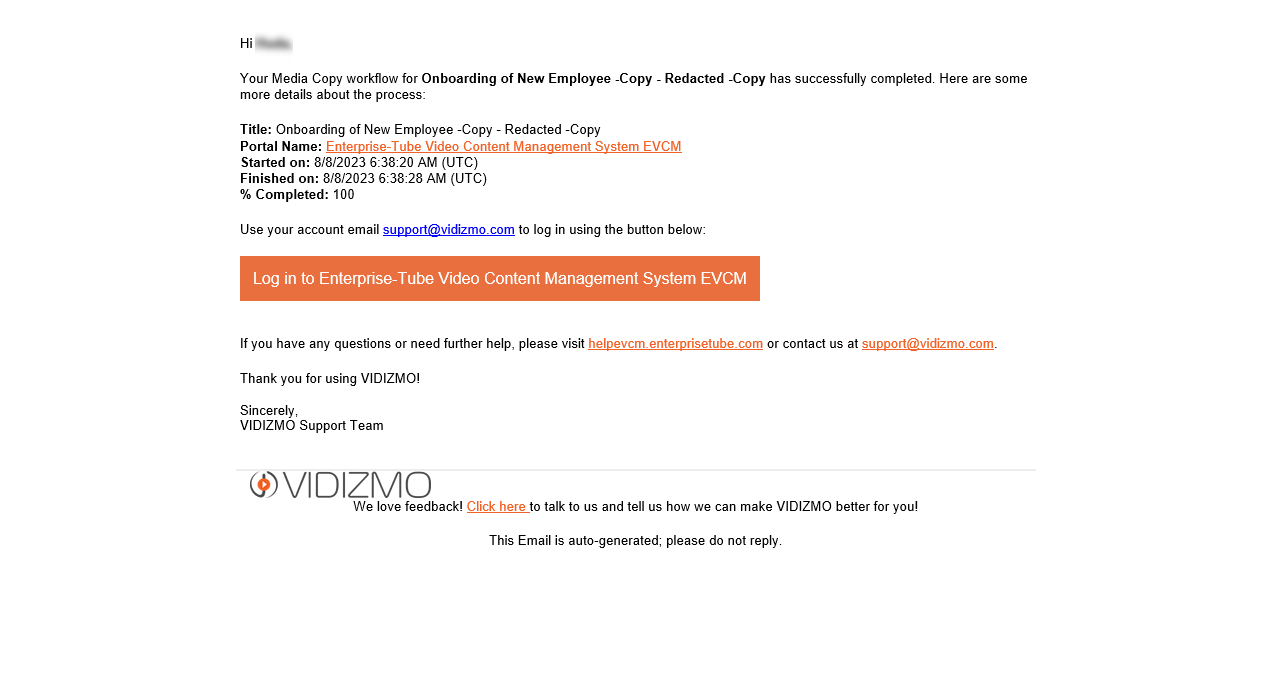
- Upon completion, an email will be sent to you about the completion process.
Verifying the Copy
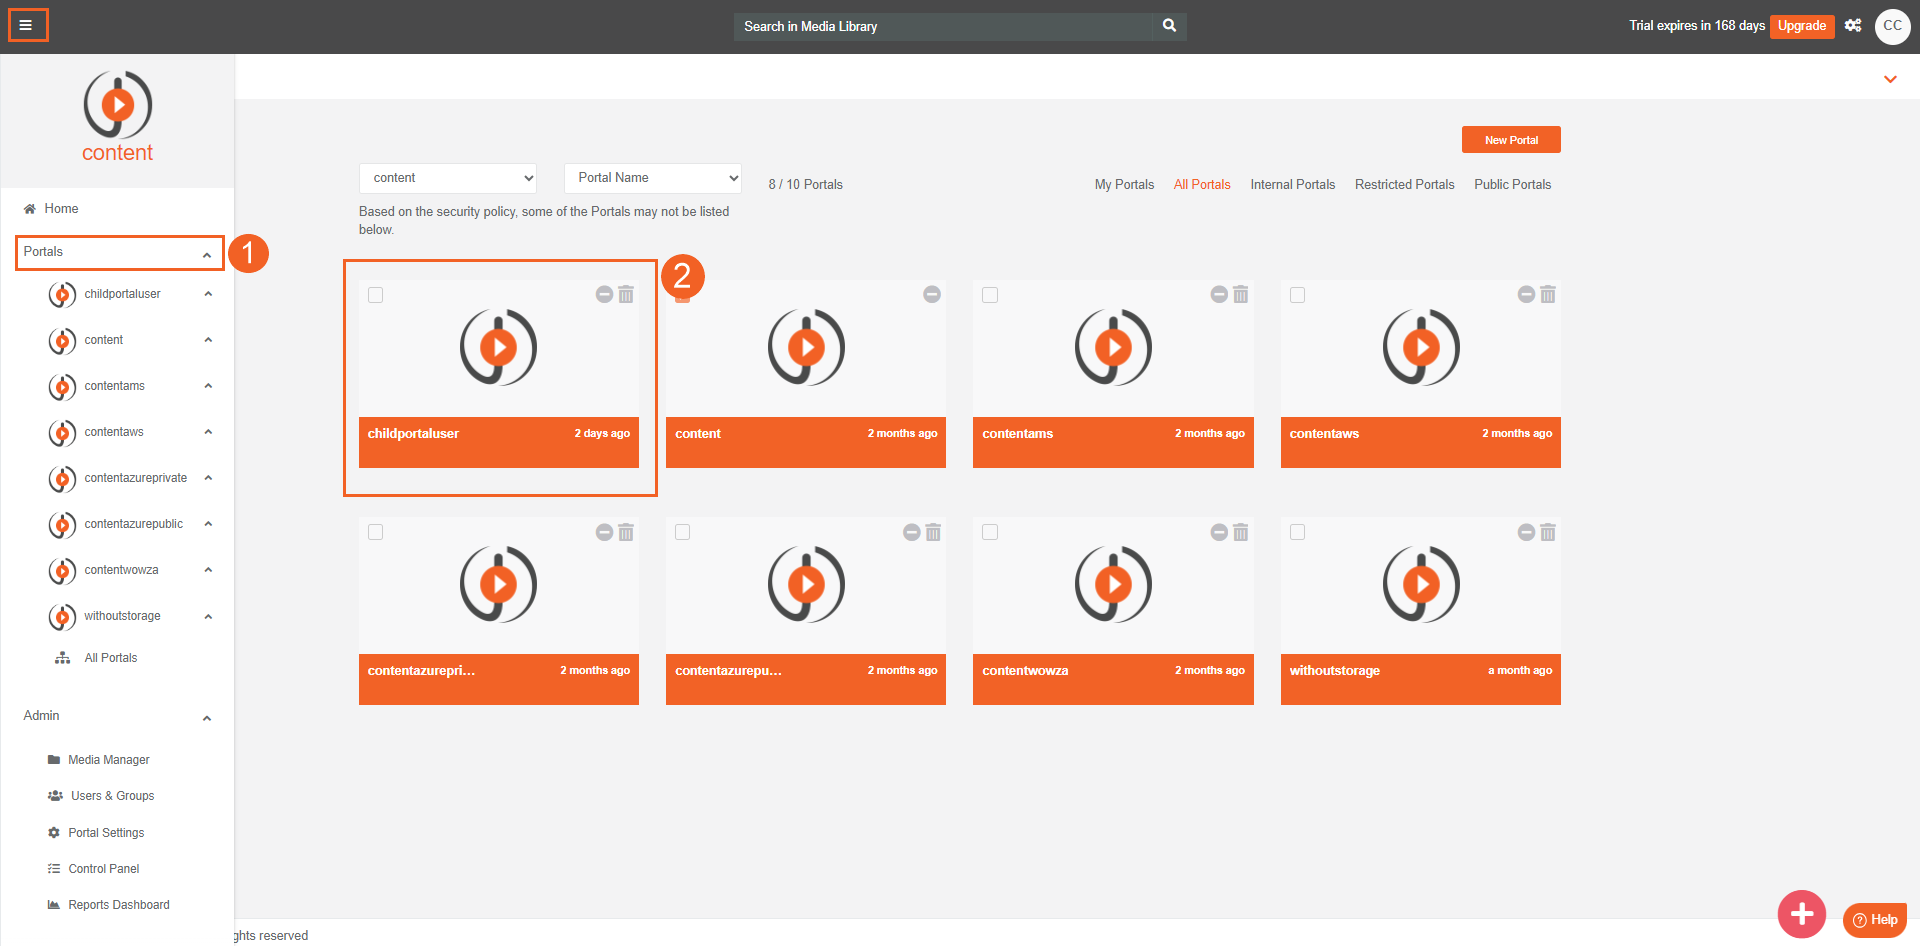
- Open the navigation menu and navigate to the Portals page.
- From there, choose the specific portal in which you copied the media.
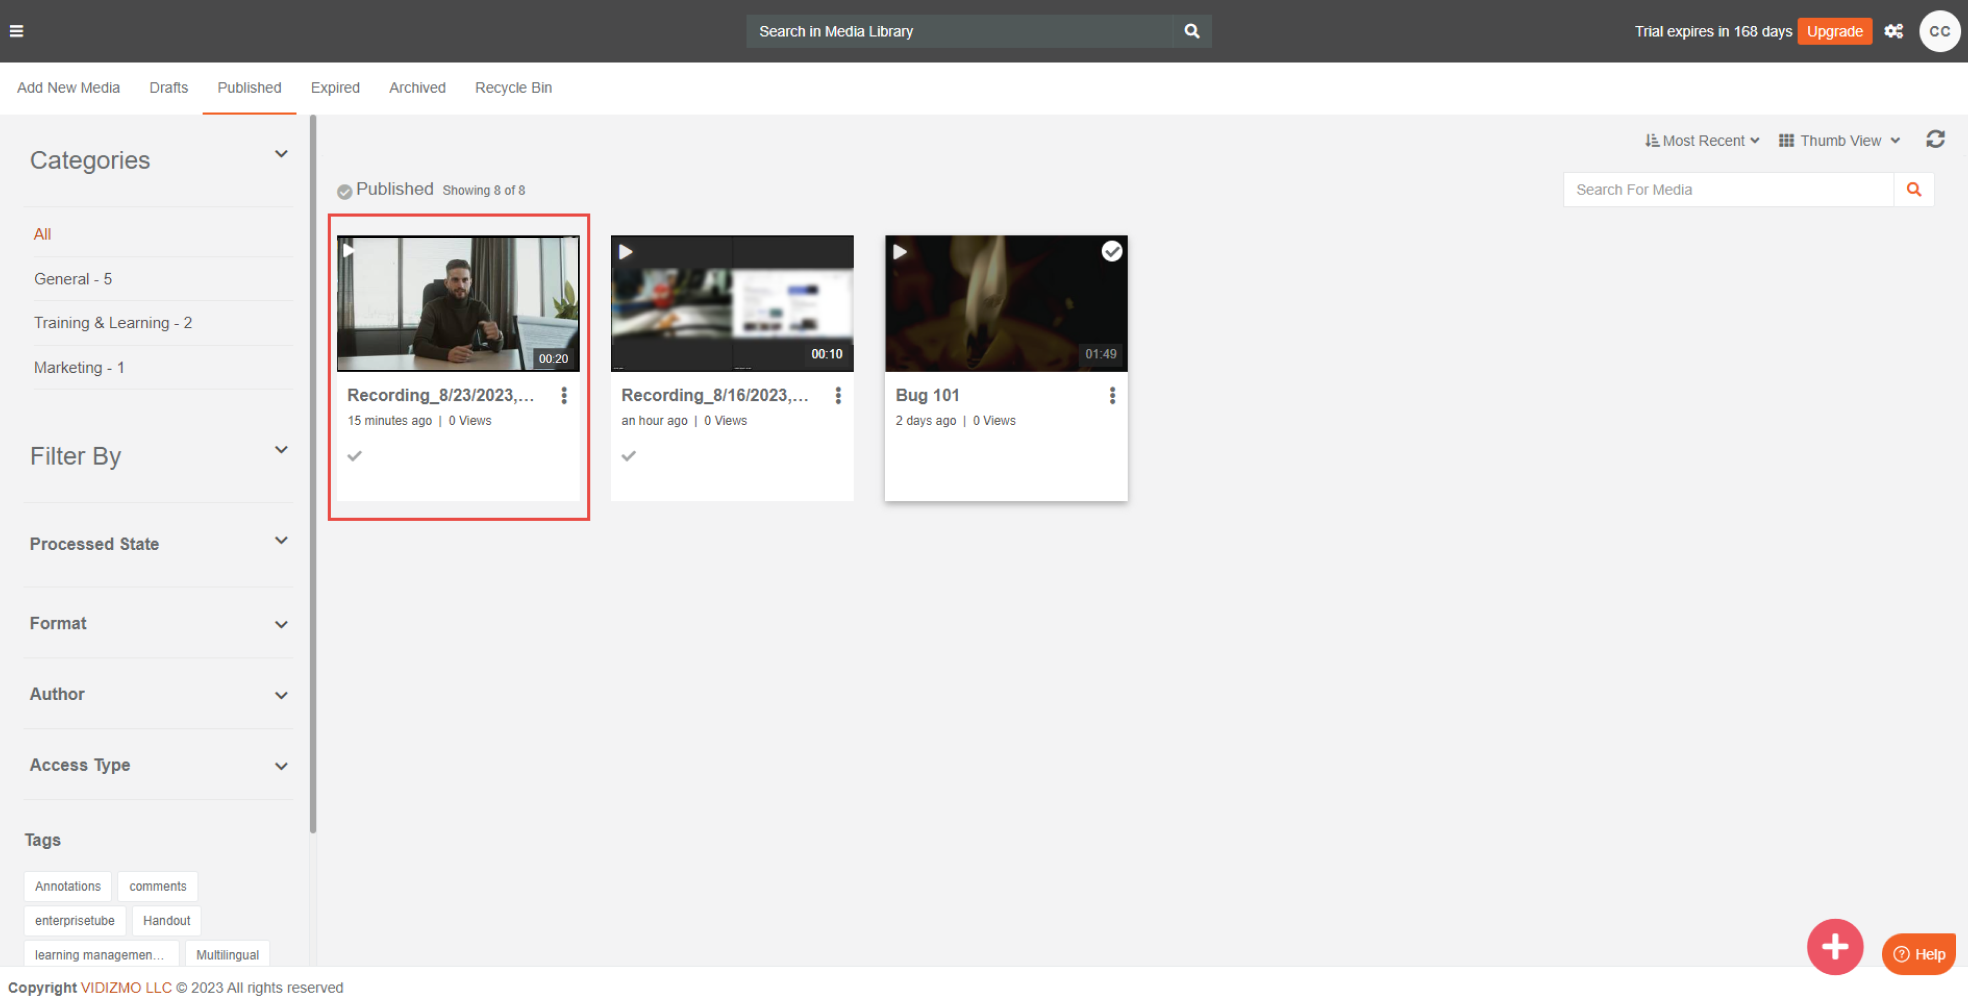
- Once within the chosen portal, navigate to its Media Manager or the specified location.
- The recently copied media will be available in the Media Library or specified location.
The management and sharing of media content across portals have been seamlessly upgraded for greater convenience. The Copy feature facilitates the effortless transfer of your media between portals or within a single portal, streamlining the process significantly.
See Also
If you are using the DEMS product, we recommend reading our article "Copying Evidence Across Portals in Your VIDIZMO Account" for detailed guidance on copying evidence between portals within the DEMS product.